
How to Take Professional Product Photos (A Guide for eCommerce Sellers)

Your product can fall flat online when the lighting washes out colors or a messy backdrop obscures details. In product styling, choices about props, backdrop, angle, and composition significantly influence how a buyer perceives your item. This article breaks down how to take professional product photos with clear, practical steps on lighting, camera settings, depth of field, white balance, flat lay setups, background choices, and simple post-processing so you can build consistent eCommerce and brand-ready images.
Caspa AI's product photography helps you do that by giving tools that speed up styling, suggest better angles, unify lighting, and simplify editing so you spend less time learning and more time selling. It uses practical presets, easy retouching, and straightforward workflow tips to help you produce polished photos fast.
Table of Contents
Summary
Professional product photos are a primary trust signal, with 67% of consumers stating that image quality is essential when selecting and purchasing a product. Therefore, imagery must convey texture, scale, and usage instantly.
High-quality images materially increase engagement on paid and social channels, with products receiving 40% more engagement when images meet marketplace and ad expectations.
You can achieve studio-grade results with accessible gear, as 80% of product photos are taken with smartphones. A tripod can reduce camera shake by up to 90%, making stability and control the most cost-effective investments.
Standardized capture and automated editing reduce production friction, with automation capable of cutting production costs by an order of magnitude and compressing review cycles from days to hours for growing SKU catalogs.
Image discoverability improves quickly when you treat photography as content, as a 350-SKU sitemap overhaul produced measurable Google Image referral gains within one month after adding structured image metadata.
Start shoots with conversion-focused objectives, as 80% of online shoppers say product photos are the most critical factor in their purchase decision. A locked five-shot workflow, combined with on-set QA, prevents reshoots and speeds up approvals.
Caspa AI's product photography addresses this by providing tools for consistent lighting, background removal, batch templating, and automated exports, thereby compressing review cycles and standardizing imagery.
Why Professional Photos Matter to Brands
Professional photos matter because they are the fastest, most reliable way to signal quality and reduce purchase friction. Fantastic imagery answers unasked questions about texture, scale, and use, and it shortens the path from discovery to checkout by making the product feel real and dependable.
How Do Photos Shape Customer Trust?
When a photo feels deliberate and consistent, customers assume that the product and the brand are intentional and consistent as well. According to UC Brand Labs, 67% of consumers say the quality of a product image is essential in selecting and purchasing a product, indicating that image quality is not merely decorative; it is a primary indicator of trust. That trust translates into fewer returns, fewer questions to support, and higher average order values because customers arrive with clearer expectations.
Why Must Visuals Stop The Scroll?
Attention is compressed online, and the images that tell a story stop people long enough to consider a purchase. “Attention is short, everything moves fast, and the images that stop the scroll are the ones that tell a story," according to Harriet Weavers. A single hero shot that shows use, scale, and context can replace three bullet points of copy. Think of a weak product photo like a muffled storefront sign; it creates hesitation and suspicion before the customer even reads your headline.
What Do Poor Images Actually Cost You?
This pattern is evident across small brands and marketplaces: budgets are stretched on logistics and reshoots, while listing pages appear inconsistent and amateur. It’s exhausting when teams spend days coordinating a studio, shipping fragile SKUs, and approving proofs only to find the style drifts across product lines.
That friction:
Raises overhead
Delays launches
Makes scaling content a nightmare
From Chaos to Control or Scale, Speed, and Automation
Most teams manage product images with recurring photo shoots and manual edits, because it feels familiar and controlled. As SKUs grow, that approach fragments: file versions multiply, color treatments drift, and review cycles stretch from hours into days, which stalls promotions and erodes seasonal momentum.
Platforms like Caspa AI provide an:
Alternative path
Automating background removal
Magic erase
Upscaling
Curated templates
End-to-end listing creation
Teams can produce studio-grade lifestyle and A+ content at scale, cutting production costs by an order of magnitude and reclaiming dozens of hours weekly.
How Do Better Photos Improve Channel Performance?
High-quality images do more than look good; they change how algorithms and buyers behave. Search and marketplace listings favor unique, high-resolution images with consistent framing and accurate alt text, which enhances visibility and click-through rates. On social and paid channels, a compelling lifestyle image makes the difference between a pause and a scroll past; better imagery reduces cost-per-click and lifts conversions by shortening the cognitive path from interest to belief to action.
How Do You Keep Creativity Without Chaos?
If creative direction is the compass, technical consistency is the rail system that keeps trains running on time and on schedule. Maintain a concise style guide that includes precise lighting recipes, color targets, and framing guidelines; utilize templates to enforce these rules consistently across product families.
When we standardize a five-shot workflow, teams stop guessing, and approvals move from nitpicky to strategic, like:
Hero
Angle
Detail
Scale
Lifestyle
That discipline frees creative energy to experiment where it matters, such as in narrative photography and the use of contextual props.
The Quality vs. Cost Trap or Bridging the Production Gap
It’s one thing to want professional photos, and another to produce them repeatedly without blowing budget or timeline; the gap between those is where most brands fail, and where the next step matters most. That solution sounds tidy, but what photographers actually pack for a shoot reveals a different set of tradeoffs and surprises.
Related Reading
• Packshot E Commerce
• Best Background for Product Photography
• Visual Merchandising Ecommerce
• Product Photography Lighting
8 Tools Needed for Professional Product Photos
To consistently produce studio-quality product photos, you need eight key elements:
A staging surface
A capture device
Stable support
Controlled lighting
A small-item studio
Light control tools
Clean backgrounds
Software that converts shoots into repeatable, scalable assets
Below, I walk through each item, practical budgets, how we use them, and the tradeoffs you must manage to keep shoots fast and consistent.
1. Table
A flat, stable surface is the staging heart of every shoot. When we restructured a weekly product shoot over four weeks, a folding table in the $20 to $50 range proved fast to set up, portable for small studios, and wide enough to leave room for lights and reflectors without crowding the frame. Use clamps or sandbags on legs for extra stability, and plan the table height to match the camera tripod so your composition stays consistent from shot to shot. For fragile or reflective items, add a thin non-slip mat to prevent shifting and reduce micro-movements during styling.
2. Camera
Choose a capture device that fits your workflow. A mid-range DSLR, such as the Canon EOS Rebel T7, offers complete manual control over aperture, shutter, and ISO, and typically costs around $400. Modern phones can produce studio-grade results when used correctly. According to Graphic Design Eye, 80% of product photos are taken with a smartphone, which underscores the accessibility of phone cameras for eCommerce shoots. If you go phone-first, choose models with manual exposure controls or use a camera app that locks focus and exposure. Then, capture in RAW where possible to preserve editing latitude.
3. Tripod
Stability makes a significant difference in product photography, particularly for detail shots and low-light exposures. Invest in a sturdy tripod with a center column that can be lowered horizontally for flat-lay or overhead shots; the Amazon Basics 60-Inch is a reliable, budget-friendly choice that works with both cameras and phone mounts. According to Graphic Design Eye, a tripod can reduce camera shake by up to 90%, which is why even phone shoots should use a locked support rather than handheld framing. Use a remote shutter or two-second timer to eliminate the last bit of movement.
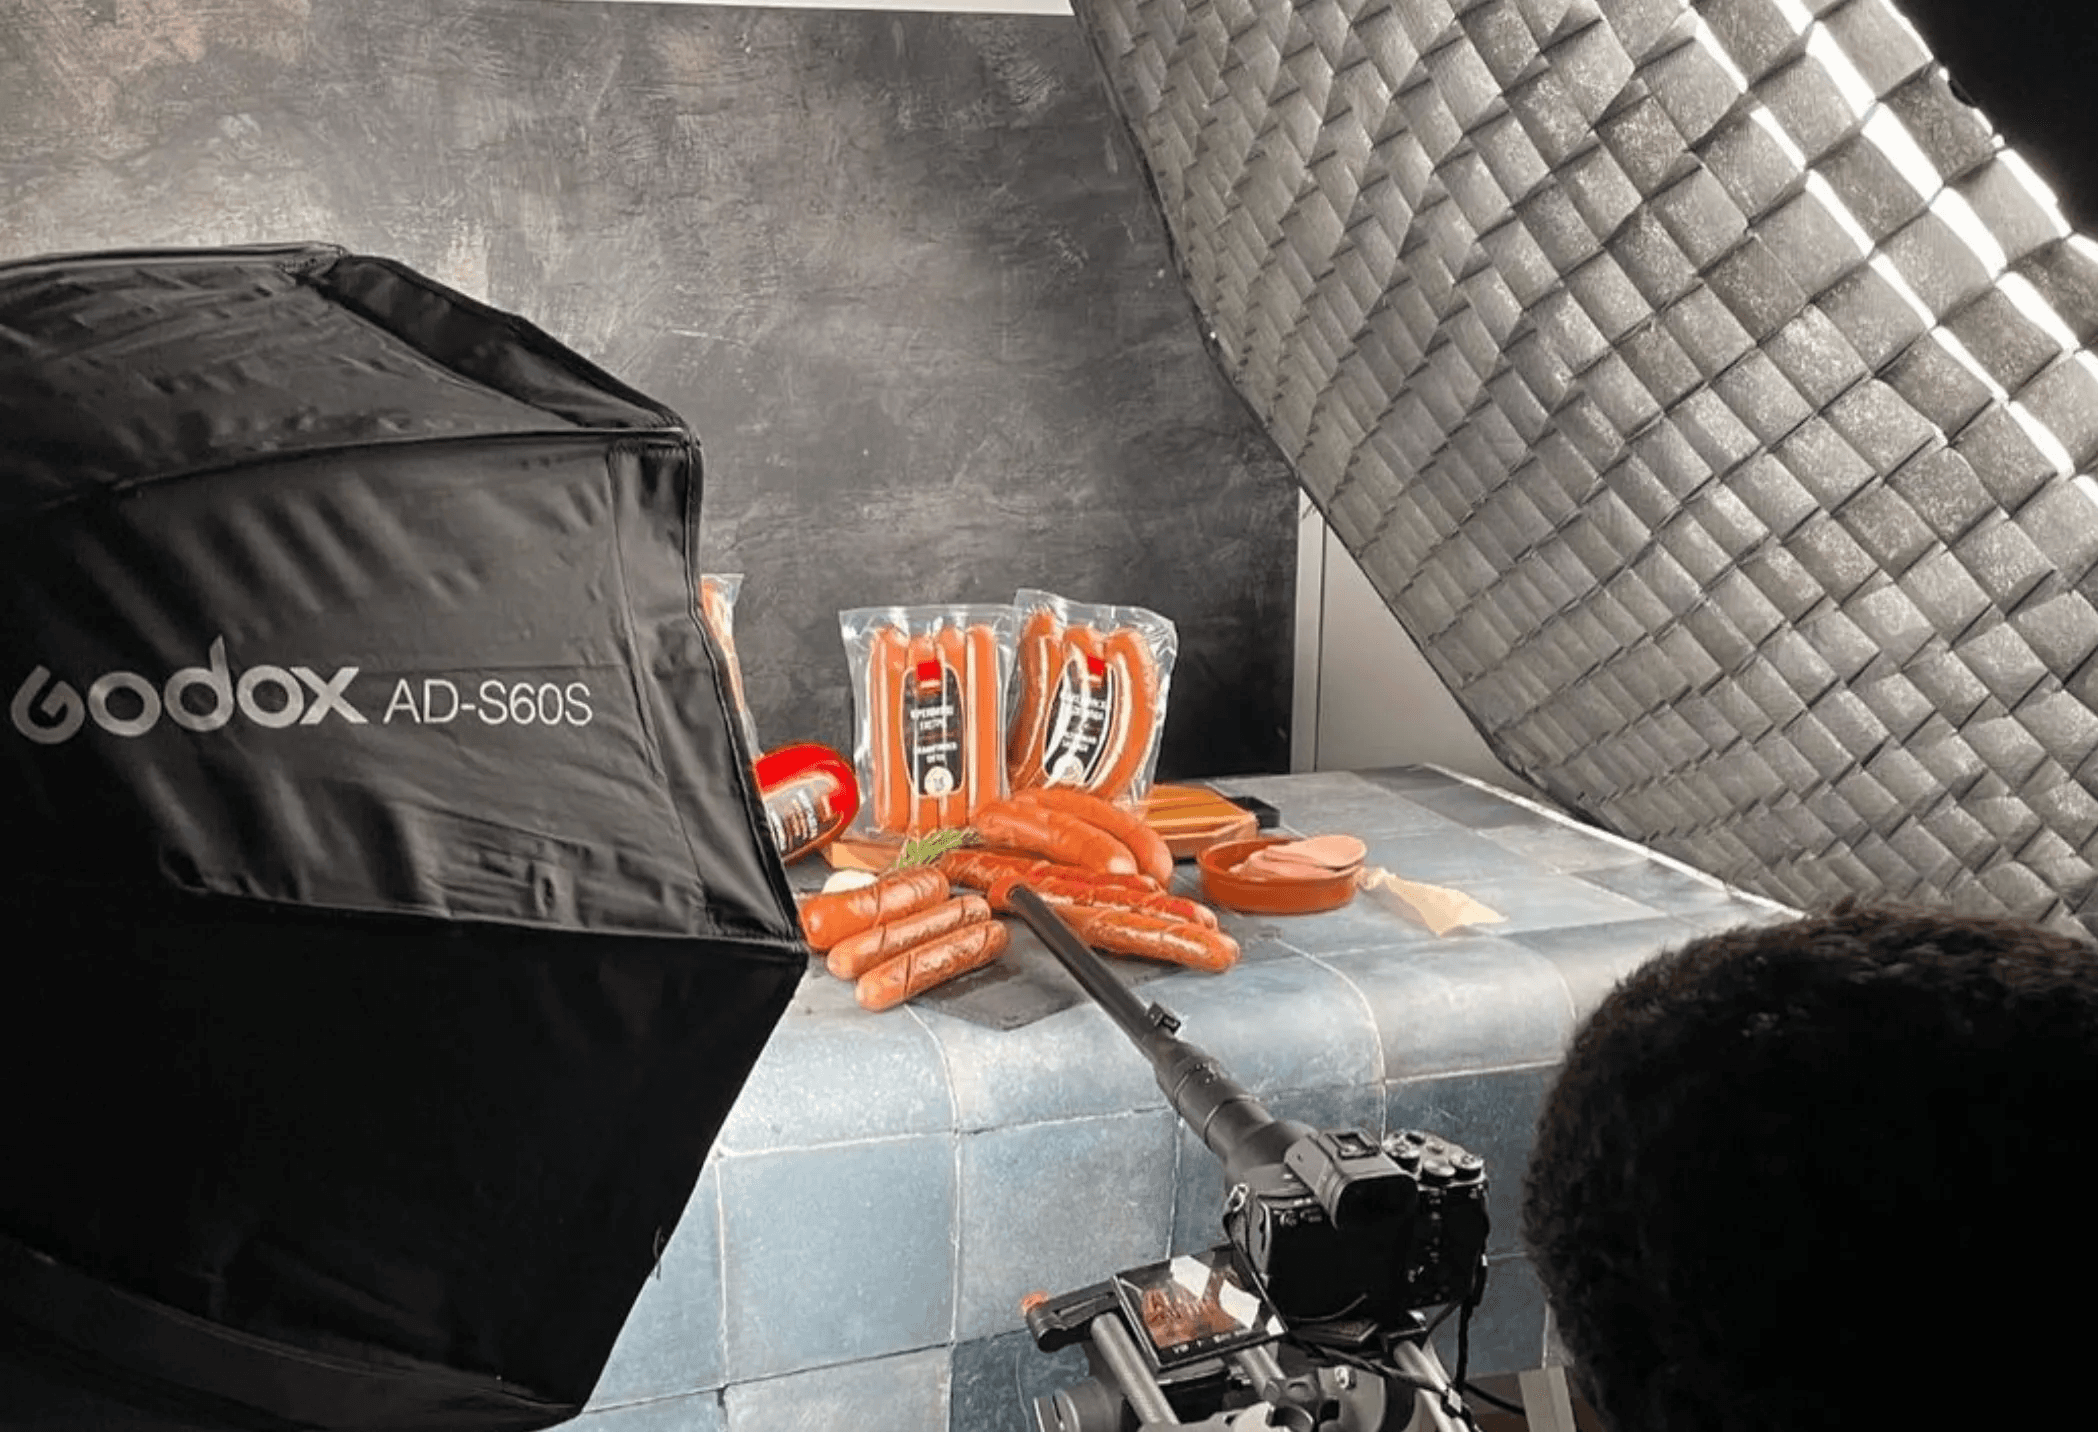
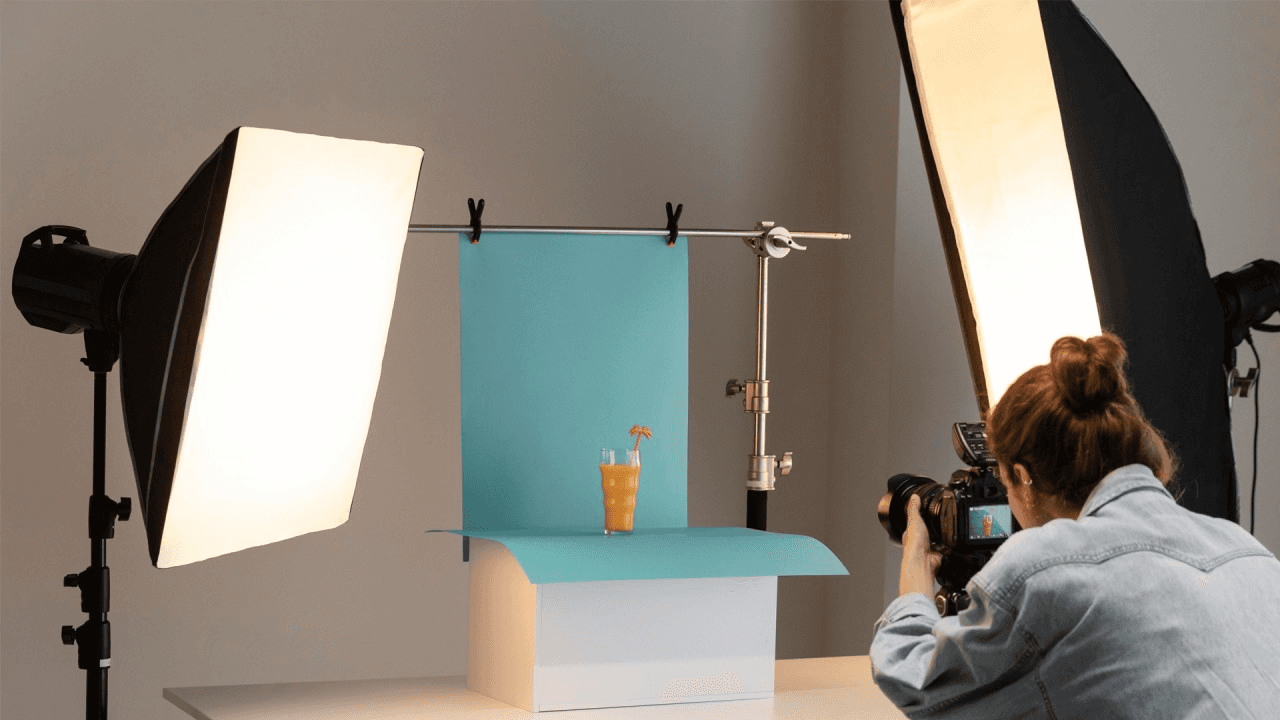
4. Lighting Kit
Controlled light is the only consistent way to get repeatable color and shadow. An LED kit with adjustable color temperature and softboxes provides broad, soft illumination without hot spots, and kits typically range from $50 to $100 for basic setups. Set the leading lights at roughly a 45-degree angle for a soft wrap, then use smaller fill lights or reflectors to tame the shadows. For shiny or reflective objects, add flagging cards to block unwanted bounce and shoot test exposures to set highlight rolloff, which saves hours in retouching.
Consistency at Scale or The Hidden Cost of Scaling SKUs
Most teams hire studio time and photographers because that approach feels straightforward and gives a one-off result that checks the box, which is understandable when product counts are small. As SKUs multiply, that familiar process creates hidden costs: inconsistent framing, long approval cycles, and mounting edit backlogs that stall launches. Teams find that platforms like Caspa AI centralize editing with features such as background removal, magic erase, upscaling, curated templates, and end-to-end listing creation, compressing review cycles from days to hours while preserving a single, auditable style across hundreds of SKUs.
5. Lightbox or Photo Tent
For small or intricate products, a lightbox gives even, shadow-soft lighting and a predictable capture environment. Portable photo tents in the $50 to $100 range are ideal for jewelry, electronics, and accessories, as they eliminate harsh reflections and allow you to control a single white or colored sweep. Place small diffused LEDs around the tent edges rather than direct overhead lights to keep specular highlights crisp and avoid hotspots that require patch edits later.
6. Reflectors
Reflectors are inexpensive but high-impact tools for shaping light, costing roughly $15 to $25 for multi-surface kits. Use white for soft fill, silver for punchy highlights, and black for subtractive control when you want hard-edge separation. For portraits or mannequin shots, a gold surface warms skin tones slightly; for product detail, a small silver card can tuck a catchlight into a textured surface. When you lack a commercial reflector, foam core or folded white paper can serve as an approximate fill surface for close-up work.
7. Backdrop
A seamless backdrop provides a clean frame and reduces post-production work for edge masks. White paper rolls or vinyl sweeps in the $10 to $50 range are standard because they reflect light and make clipping easier. Muslin works well when you want textured or lifestyle looks. Mount backdrops on a stand with a C-clamp and weights, and stretch the lower section into an infinity curve to prevent fold lines at the base. Match the background material to the product size and finish, and swap it only when the visual story requires it, so your catalog remains consistent.
8. Caspa AI
Capture is only half the job; editing and scaling are where margins can be improved. Caspa AI is an all-in-one platform that:
Automates background removal
Magic eraser
Upscaling
Template application
Model insertion
It enables teams to create ultrarealistic lifestyles and A+ content without requiring repeated studio hires or complex Photoshop chains. For teams that started with manual shoots and heavy retouch cycles, solutions like Caspa AI reduce the hours spent on tedious edits, enforce consistent brand templates, and make it feasible to push fresh imagery across channels with minimal coordination.
Beyond the Toolset or Process Trumps Product
The tools matter, but how you sequence and standardize them is the gap between occasional good shots and a predictable, revenue-driving content engine.
Related Reading
• Advertising Product Photography
• Holiday Product Photography
• Product Photography Angles
• Luxury Product Photography
• eCommerce Product Imagery
• Amazon Product Photography
How to Take Professional Product Photos in 6 Simple Steps
Treat the shoot as a production step that earns revenue:
Set the conversion goal
Lock a repeatable shot plan
Control capture and QA
Style for the product’s unique points
Automate editing and export so images ship fast and consistently
Do those six things in order, and you move from one-off good shots to predictable, high-converting assets.
What Am I Trying To Prove With This Image?
Start every shoot with a single conversion question: what must a buyer believe after one glance?
Frame that as a measurable objective, whether it is:
Reducing returns
Increasing add-to-cart rate
Shortening time-to-purchase.
According to the Amazon Blog, “80% of online shoppers say that product photos are the most important factor in their purchase decision.” Use that objective to prioritize which shots you take first.
How Should I Plan My Six-Step Shoot Day?
Break the day into six clear stages:
Objectives and KPIs
A prioritized shot list
A locked capture protocol
Intentional styling
On-set verification
Batch postprocessing with templates
Building the shot list around conversion tasks keeps the team focused, so you do hero and USP-detail shots first, then scale and lifestyle. This planning reduces last-minute styling changes and avoids reshoots when a campaign deadline looms.
How Do I Prevent Lighting and Color Drift During a Multi-SKU Session?
This is where discipline beats improvisation. Use a single lighting recipe per SKU family. Include a color reference card in the first frame, and tether or preview frames on a calibrated monitor to instantly check white balance and exposure. This solves the common problem that appears across window-lit and makeshift studios, where changing natural light forces extra retouching and inconsistent catalog pages.
What Styling Rules Actually Move Conversion?
Style to prove the claim you want the photo to make. If you claim “premium leather,” show a close-up crop that reveals grain and stitch scale, plus a contextual shot that gives size reference. If usability is the claim, include a clear in-use frame. Prioritize the USP shot early in the shoot, because when teams capture that image first, approvals focus on product truth rather than aesthetics.
How Do We Check Quality On The Spot So Editors Are Not Firefighting Later?
Adopt a short, repeatable on-set QA checklist:
Color match to the target patch
Critical sharpness at 100 percent
Correct crop and background edge falloff
Shadow consistency
Accurate SKU metadata embedded at capture
Capture one locked raw files, along with a low-res proof for reviewers, and name the files with the SKU and shot type so that nothing gets lost in the edit queue. This single change eliminates the ambiguous feedback loops that stretch review cycles.
Centralized Editing, Standardized Style
Most teams manage editing by passing RAW files to freelancers and tracking feedback in email, which feels familiar and low-friction.
As SKU counts rise, that habit fractures:
Feedback scatters
Visual style drifts
Time from shoot to publish stretches into a day
Platforms like Caspa AI provide an alternative path, centralizing:
Background removal
Magic erase
Upscaling
Curated templates
Teams can keep a single brand style while compressing review cycles and reclaiming time.
How Should I Complete the Process to Scale Assets Across Channels?
Use editable templates and batch rules for cropping, color profiles, and text overlays, then run an automated QC pass that flags contrast outliers and uniform background artifacts. Maintain a single master source file per SKU and generate channel-ready exports from it, including embedded metadata and alternative text. This makes it practical to push consistent hero, angle, and lifestyle images to marketplaces, social, and paid ads without manual rework, which is where you actually see ROI from better photography.
Image Quality Drives Conversion
Over 70 percent of buyers rate image quality as a significant purchase factor, so make every image tell the same truthful story, and the rest of your merchandising follows. See how this turns a studio day into a repeatable content engine, then ask what to do with those final assets next.
How to Leverage Your Product Photos

Leverage product photos by treating them as channel-specific assets, not one static file, and by automating the boring parts so your team spends time on decisions that move revenue. Optimize discovery, tailor crops and exports to each destination, and measure image-driven behaviors with the same discipline you use for pricing or creative tests.
Why Does Image Discoverability Matter For You?
Search engines and social platforms now treat images like content, not decoration. Add an image sitemap, embed schema.org ImageObject with captions, and maintain descriptive filenames and IPTC tags to provide context for machines. Ensure your CDN serves responsive WebP or AVIF variants to strike a balance between quality and load time. When we rebuilt image sitemaps and added structured image metadata for a 350-SKU catalog over four weeks, Google Image referrals rose measurably within that month because the site suddenly presented clear, indexable signals.
How Should You Tailor Exports For Each Channel?
The crop or file you upload changes the attention and conversion. Create a canonical master, then generate channel variants with locked templates: hero 1200x1200 for marketplaces, vertical 1080x1350 for Instagram feed, 4:5 for ads, and a wider crop for Pinterest. Use on-the-fly transforms from your CDN, allowing you to A/B test crops without reuploading. That payoff is practical, as Squareshot notes, “Products with high-quality images receive 40% more engagement than those without,” which explains why a crop that wins on paid channels usually pays for its production cost within two campaigns.
What Role Should UGC And Polished Assets Play Together?
User photos build trust, but raw UGC rarely plugs directly into a product page without work. Curate a moderated UGC feed, obtain usage rights, and run each image through a light template pass that adjusts the background, crop, and color to ensure the asset aligns with your catalog frame. This preserves authenticity while protecting consistency. This approach solves the common problem where teams flood pages with mixed-quality UGC, then watch conversion become noisy because visual signals conflict.
From Review Drag to Instant Scale
Most teams stick with manual feedback loops and single-master images, which feels familiar and low risk. As SKUs and stakeholders grow, that habit creates review drag, inconsistent crops, and channel mismatches that erode performance.
Solutions like Caspa AI provide an alternative path; teams find that platforms such as this centralize:
Background removal
Magic erase
Batch templating
Automated alt-tag generation
It compresses review cycles from days to hours while producing channel-ready exports at scale, cutting production costs by an order of magnitude and reclaiming dozens of hours each week.
How Do You Prove Which Images Actually Move Sales?
Run controlled image A B tests where everything except the hero image remains constant, then measure add-to-cart rate, click-through, and return rate per variant. Use session thresholds, such as 10,000 exposures or a two-week window, to achieve statistical confidence. Combine that with heatmaps on your product page to see whether attention is drawn to the variant detail you intended to highlight, and track downstream metrics like checkout conversion to avoid false positives from curiosity clicks.
What Quick Workflow Hacks Scale Without Breaking Quality?
Adopt a single source file per SKU, embed canonical metadata, and build a naming convention that encodes SKU, shot type, and channel. Automate srcset and alt-tag generation with templates, then insert a mandatory human QA gate for high-impact SKUs. Treat your image CDN as the last mile: let it crop, compress, and serve formats tailored to each device, rather than maintaining dozens of stored files. Think of your catalog like a kitchen, mise en place first, then a single plated design that can be reproduced quickly for every ticket.
Where Should You Invest First If Resources Are Tight?
Prioritize the touchpoints that drive traffic and where image-driven decisions are made, typically paid channels and top-of-funnel marketplace listings. Automate exports there, then use A/B tests to justify expanding the pipeline. If you can only fund one tool, invest in a solution that centralizes editing, templates, and channel exports, thereby removing repeatable friction and freeing up creative time for the shots that require a human touch.
Visuals as a Conversion Lever
Visuals are the decision engine; treat their production and distribution like a conversion lever, not a creative afterthought. That solution sounds tidy, but the next step reveals a harsh truth that most teams overlook.
Get Product Photos that Increase Your Sales Today
Consider Caspa AI for product photography that turns visuals into conversions. With ElectroIQ, 93% of consumers consider visual appearance the key deciding factor in a purchasing decision, and 60% of consumers are more likely to consider or contact a business when an image appears in local search results. Consistent, studio-quality images are a business necessity. We make it practical to replace scattered tools and costly studio days with a single, fast workflow that delivers ultra-realistic photos live where buyers search, so you can focus on growth instead of fixing files.
Related Reading
• Amazon Product Image Size
• Hero Shot Product Photography
• E-commerce Product Photography
• Flat Lay Product Photography
• Camera Settings for Product Photography
• Best Size for Etsy Listing Photos